Hi, there. This is my second calendar design process. The steps are basically similar to my previous calendar 1 tutorial. So, let's start the tutorial now~
Tools used: Wacom Bamboo Fun Tablet & Mouse
Software Used: Paint Tool SAI, Adobe Photoshop CS4, Adobe Illustrator CS4
Part A - Character Sketch
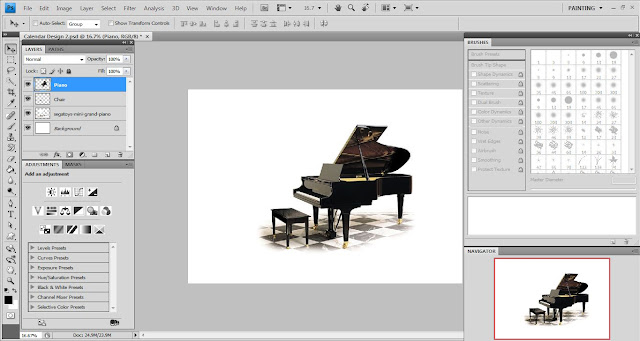
1 Extract the piano and chair out from the image I downloaded. Use the same technique( mask and brush ) to cut the images out. Put the piano and chair in 2 different layers.

2 Export it to Paint Tool SAI and start illustrating a character.

3 Export it back to Photoshop again.
Part B - Piano Adjustment


4 Select the leg of piano using Quick Selection Tool ( Hotkey>W ). Press Ctrl + T ( free transform ) to extend the leg. Repeat these 2 steps for the other 3 legs.
Part C - Character Hair Painting

5 Now, we can start painting. Let’s start with the hair. Apply a light blue paint at the first new layer.

6 Paint a darker blue at the next created layer.

7 Highlight certain part of the hair with a more darker blue.
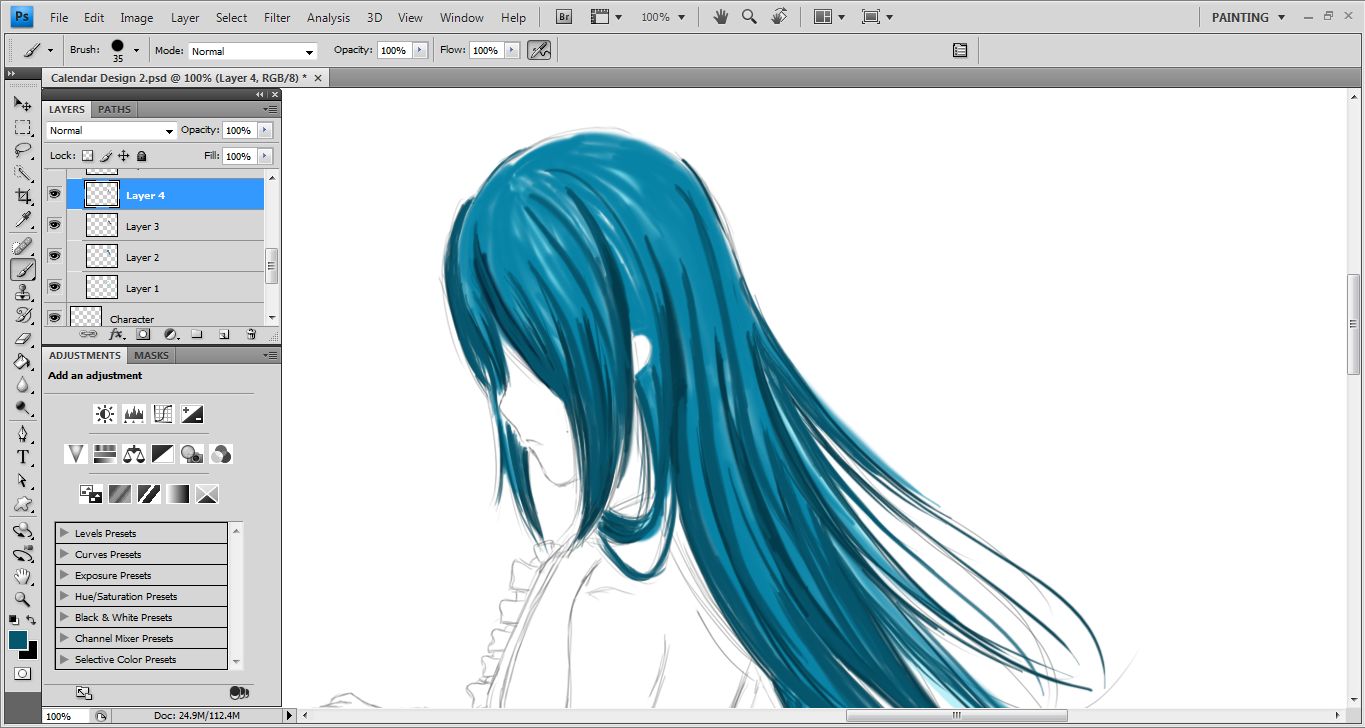
8 Continue painting the hair with different blue. Use Smudge tool to blend the color or give the color a “push”.

9 Paint a dark blue over the other layers.

10 Duplicate this layer and change its layer blending mode to Hard Light.

11 Continue highlighting with a darker blue at the other new layer.

12 Paint a lighter blue and set the layer blending mode to Soft Light.

13 Add more detail to the hair using a 1 pixel white brush.

14 Use a brush with larger diameter to paint a circle and set its layer blending mode to Linear Dodge ( Add ) after applying Gaussian Blur effect to the circle you’ve just painted.

15 Repeat Step 14 for layer 10.

16 Group all the hair painting layers and make a copy of this hair group.
Part D - Character Dress Painting

17 Open a new layer and paint the cloth. Paint the shadow of skirt at the same time.

18 Paint the shadow of vest at a new layer.

19 Use a larger diameter black brush to paint a big circle again. Blur it and set the layer blending mode to Exclusion.

20 Continue painting the skirt with a dark blue.

21 Paint the waist region with black.

22 Draw the folded part of cloth with black brush and set the layer blending mode as Overlay.


23 Now, paint the lace. Paint the shadow at a new layer.


24 Paint the shadow of her white shirt.

25 Create an extra glow by painting a white blur circle.

26 Group all the cloth painting layers and duplicate it.

27 Link the Dress groups and place them under the Hair groups.
Part E - Character Boots Painting

28 The process is now proceeding with the boots painting. Paint bark blue as base color.

29 Paint the rest regions black. Paint the end part of boot white and use Smudge tool to blend the white color.

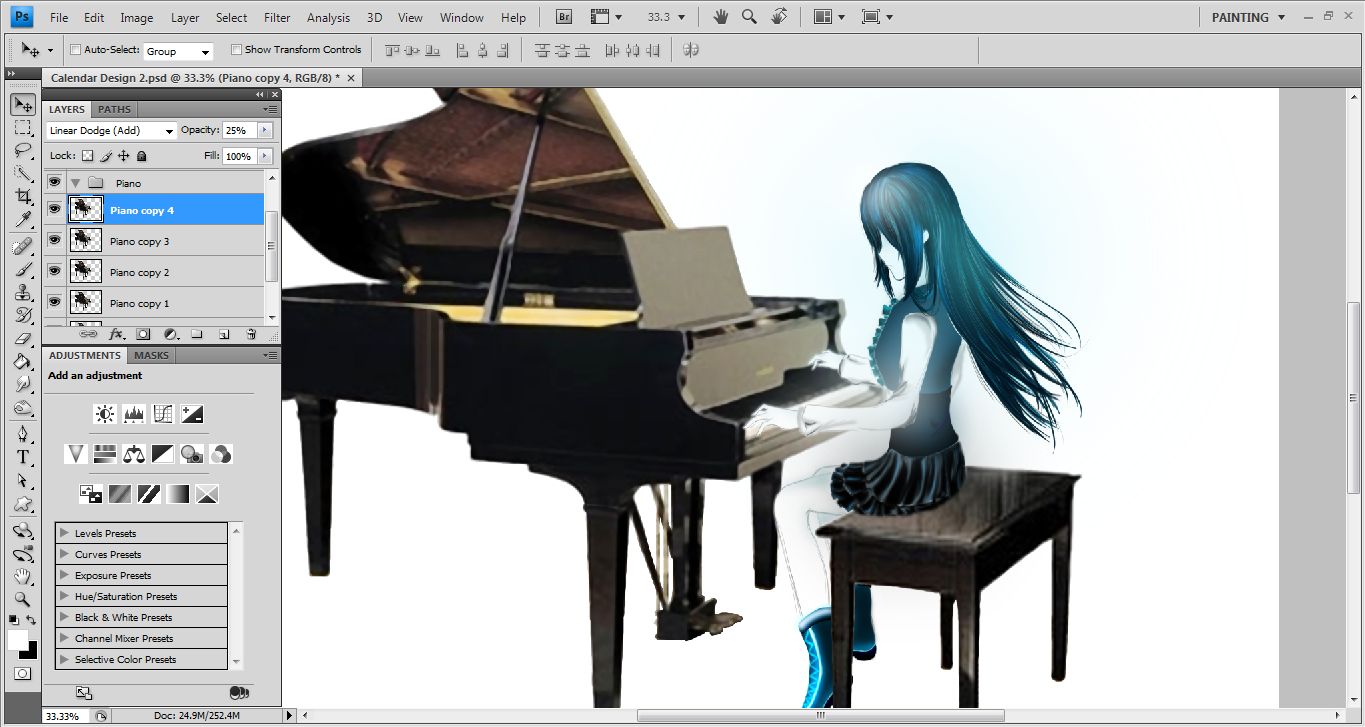
30 Blur the light blue color painted in a new layer and set its layer blending mode to Vivid Light.

31 Paint the shoe lace a blur light blue and adjust its layer style ( apply Outer glow ).

32 Paint the shadow of her boots.

33 Apply Outer glow effect again to a just painted light blue ( at the top of boots ).
Part F - Character Skin Painting

34 Now, we can start to paint the skin. Paint a light blur blue and duplicate this layer. Do remember to set the layer blending mode of Skin copy layer to Difference.

35 Group all these character painting layers as well as groups. Name it as “Character”.
Part G - Character Extra Glowing Effect

36 I want to create an extra glow for my character. Thus, I use mask and brush to select my character in a new white layer. You can do this by avoiding your Character group from invisible and select the new created white-filled layer before using the masking technique to highlight the character.
Part H - Piano Editing

37 Link the Character group and the Extra glow layer. Then, select the Chair layer and use Eraser tool to delete the unwanted part.

38 Adjust the positions of Character, Piano and Chair.

39 Make 4 copies of Piano layer. We are going to create the watercolor effect as I’ve done previously.


40 Apply Cutout (Filter>Artistic>Cutout), Dry Brush (Filter>Artistic>Dry Brush) and Median (Filter>Noise>Median) effects. Set the layer blending mode of forth Piano copy to Linear Dodge ( Add ).

40 Repeat the same process for the Chair layer.

41 Merge all the Chair copy layers and apply Photo Filter effect ( Image>Adjustments>Photo Filter ).

42 Repeat the above step for the Piano layer.

43 Set the layer blending mode of Piano copy layer to Difference.

44 Link the Piano, Chair and Character layers. Then, press Ctrl + T to adjust the size.
TO BE CONTINUED...
No comments:
Post a Comment