Saturday, January 8, 2011

Ang's Calendar 2 - Tutorial Part 2 ( Background + Effects)

Part A - Water

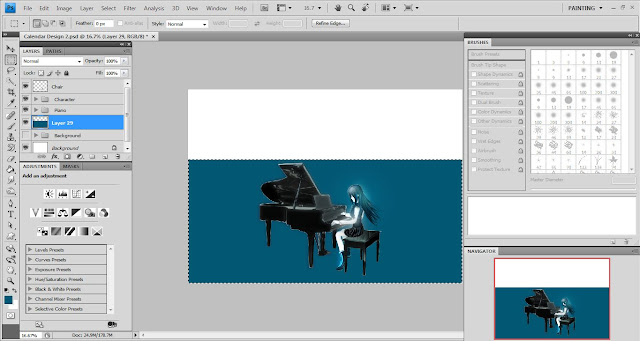
45 Use the Marquee tool ( Hotkey>M) to create a rectangle box and fill it with dark blue using Paint Bucket tool ( Hotkey>G ).


46  Now, we are going to create the water for this wallpaper. Apply Clouds, Gaussian Blur, Plastic Wrap, Chrome and Fade Chrome effect to that blue rectangle box. The process are similar to the previous tutorial.
Clouds: Filter>Render >Clouds
Gaussian Blur: Filter>Blur>Gaussian Blur
Plastic Wrap: Filter>Artistic>Plastic Wrap
Chrome: Filter>Sketch>Chrome
Fade Chrome: Edit>Fade Chrome>Linear Burn with 100 % opacity


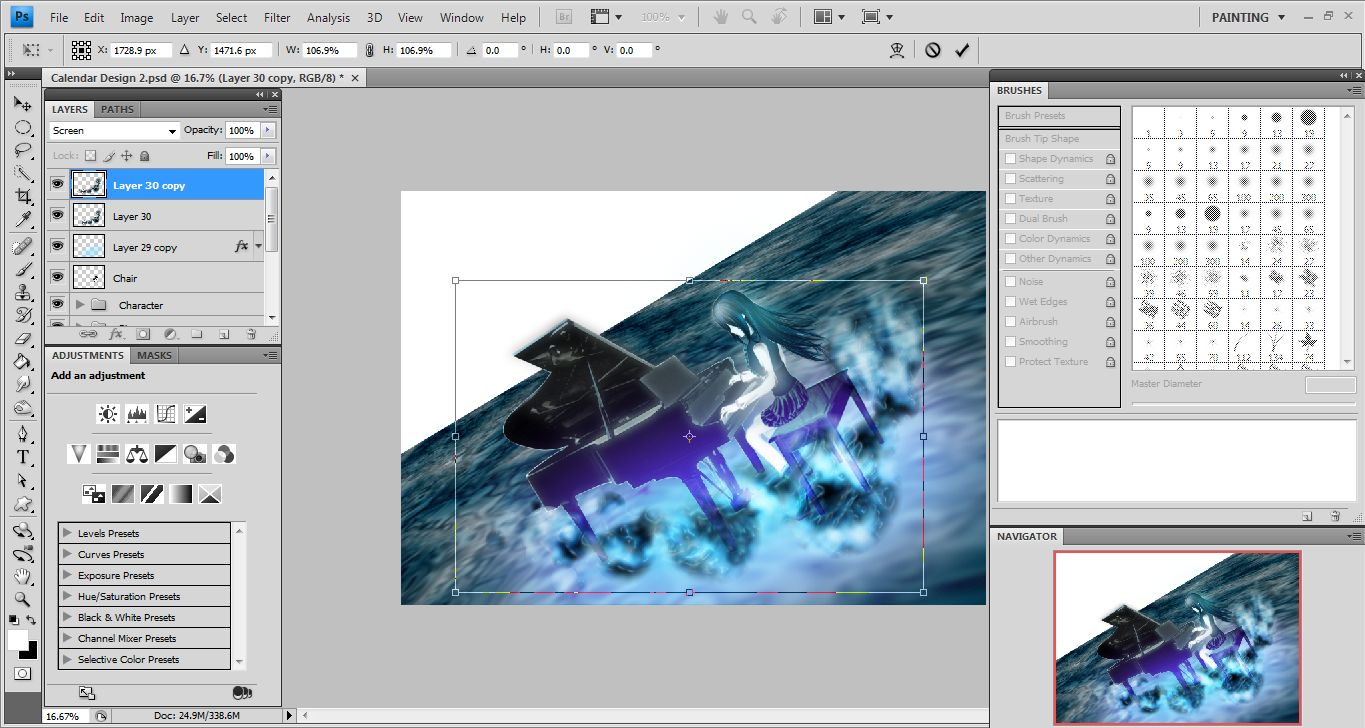
47 Press Ctrl + T ( Free Transform ) to transform the water created. To make the water looks perspective, hold down Ctrl + Shift + Alt while dragging the water box.


48 Select the Piano, Chair, Character and water layers. Rotate them 45 °.


Part B - Lightning in Water

49 Use the Elliptical Marquee tool to draw an oval under the piano in a new layer.


50 Fill the oval with light blue and rotate it 45 °.


51 Apply Gaussian Blur and adjust its layer style ( Apply Outer Glow ). Set the layer blending mode to Overlay.


52 Make a copy of this layer and place it above the Chair layer. Set its layer blending mode as Vivid Light.


53 After that, paint a few dark blue circles using brush of different sizes.


54 Apply Clouds effect ( Filter>Render>Clouds ) to the circles. Hold down Ctrl and click at the layer thumbnail to make the selection before apply the Clouds effect.


55 Continue applying Plastic Wrap, Chrome and Fade Chrome effects to this layer.


56 Change the layer blending mode to Hard Light.


57 Duplicate this layer and set as Screen layer blending mode. Enlarge its size.


58 Duplicate this layer again and set the layer blending mode to Vivid Light.


Part C - Water Splash

59 Group them and name it as “Lightning in Water”. Then, create the water splash using special water brush downloaded from Q Brush.


60 Adjust its layer style.


61 Make a copy of it and set its layer blending mode to Screen.


62 Group them and adjust the opacity of this group to 85%.


Part D - Cloudy Sky

63 After you’ve done your water splash, it’s time to create the sky and clouds.
64 Create a cloudy sky with a set of Cloud Q Brush downloaded.


65 Add two moons, which are created using special Q Brush too, in a new layer. Always play with the diameters and angles of your brush to get an ideal composition.


66 Adjust its layer style. Apply Outer Glow, Inner Glow and Color Overlay effects to this particular layer.


67 Duplicate this Moons layer and set the layer blending mode to Difference.


68 Duplicate the Moons layer again and enlarge, rotate it using Free Transform tool ( Ctrl + T ).


69 Apply 43.9 pixels Gaussian Blur to this copy layer.


70 Set the layer blending mode of this copy layer to Linear Burn.


71 Make a copy of Moons Copy 2 and set the opacity as 47%.


72 I adjust the layer style of Sky layer ( Apply Color Overlay effect ) before proceed to the next step.


73 Add more sky effects using special Smoke Q Brush set. Adjust its layer opacity to 62%.


Part E - Boundary Fog

74 Now, I want to add a fog at the boundary. Hold down Shift and paint a straight dark blue line. Press Ctrl + T to rotate the thick line painted.


75 Apply Inner Glow and Color Overlay layer style effects.


76 Set the layer opacity to 93%.

 Part F - Last Adjustment

77 Lastly, adjust the color of your wallpaper created using Brightness/Contrast Adjustments.


Part G - Watermark

78 After I’ve done my art work, I would like to add my very own logo in. You can export an AI file easily to Photoshop by simply dragging it from Illustrator and release it in Photoshop.


79 Apply Inner Glow and Bevel and Emboss layer style effects to the imported logo.


80 Change the layer blending mode to Soft Light with 90% opacity.


 Final Artwork


That’s all for my Calendar Wallpaper 2 tutorial. Thank you for reading and again CIAO~^ ^

Ang's Calendar 2 - Tutorial Part 1 ( Character + Piano )

Hi, there. This is my second calendar design process. The steps are basically similar to my previous calendar 1 tutorial. So, let's start the tutorial now~

Tools used: Wacom Bamboo Fun Tablet & Mouse
Software Used: Paint Tool SAI, Adobe Photoshop CS4, Adobe Illustrator CS4


Part A - Character Sketch

1 Extract the piano and chair out from the image I downloaded. Use the same technique( mask and brush ) to cut the images out. Put the piano and chair in 2 different layers.


2 Export it to Paint Tool SAI and start illustrating a character.


3 Export it back to Photoshop again.


Part B - Piano Adjustment   

4 Select the leg of piano using Quick Selection Tool ( Hotkey>W ). Press Ctrl + T ( free transform ) to extend the leg. Repeat these 2 steps for the other 3 legs.


Part C - Character Hair Painting 
5 Now, we can start painting. Let’s start with the hair. Apply a light blue paint at the first new layer.


6 Paint a darker blue at the next created layer.


7 Highlight certain part of the hair with a more darker blue.


8 Continue painting the hair with different blue. Use Smudge tool to blend the color or give the color a “push”.


9 Paint a dark blue over the other layers.


10 Duplicate this layer and change its layer blending mode to Hard Light.


11 Continue highlighting with a darker blue at the other new layer.


12 Paint a lighter blue and set the layer blending mode to Soft Light.


13 Add more detail to the hair using a 1 pixel white brush.


14 Use a brush with larger diameter to paint a circle and set its layer blending mode to Linear Dodge ( Add ) after applying Gaussian Blur effect to the circle you’ve just painted.


15 Repeat Step 14 for layer 10.


16 Group all the hair painting layers and make a copy of this hair group.


Part D - Character Dress Painting 
 
17 Open a new layer and paint the cloth. Paint the shadow of skirt at the same time.


18 Paint the shadow of vest at a new layer.


19 Use a larger diameter black brush to paint a big circle again. Blur it and set the layer blending mode to Exclusion.


20 Continue painting the skirt with a dark blue.


21 Paint the waist region with black.


22 Draw the folded part of cloth with black brush and set the layer blending mode as Overlay.


23 Now, paint the lace. Paint the shadow at a new layer.


24 Paint the shadow of her white shirt.


25 Create an extra glow by painting a white blur circle.


26 Group all the cloth painting layers and duplicate it.


27 Link the Dress groups and place them under the Hair groups.


Part E - Character Boots Painting

28 The process is now proceeding with the boots painting. Paint bark blue as base color.


29 Paint the rest regions black. Paint the end part of boot white and use Smudge tool to blend the white color.


30 Blur the light blue color painted in a new layer and set its layer blending mode to Vivid Light.


31 Paint the shoe lace a blur light blue and adjust its layer style ( apply Outer glow ).


32 Paint the shadow of her  boots.


33 Apply Outer glow effect again to a just painted light blue ( at the top of boots ).


Part F - Character Skin Painting

34 Now, we can start to paint the skin. Paint a light blur blue and duplicate this layer. Do remember to set the layer blending mode of Skin copy layer to Difference.


35 Group all these character painting layers as well as groups. Name it as “Character”.

 Part G - Character Extra Glowing Effect

36 I want to create an extra glow for my character. Thus, I use mask and brush to select my character in a new white layer. You can do this by avoiding your Character group from invisible and select the new created white-filled layer before using the masking technique to highlight the character.


Part H - Piano Editing

37 Link the Character group and the Extra glow layer. Then, select the Chair layer and use Eraser tool to delete the unwanted part.


38 Adjust the positions of Character, Piano and Chair.


39 Make 4 copies of Piano layer. We are going to create the watercolor effect as I’ve done previously.


40 Apply Cutout (Filter>Artistic>Cutout), Dry Brush (Filter>Artistic>Dry Brush) and Median (Filter>Noise>Median) effects. Set the layer  blending mode of forth Piano copy to Linear Dodge ( Add ).


40 Repeat the same process for the Chair layer.


41 Merge all the Chair copy layers and apply Photo Filter effect ( Image>Adjustments>Photo Filter ).


42 Repeat the above step for the Piano layer.


43 Set the layer blending mode of Piano copy layer to Difference.


44 Link the Piano, Chair and Character layers. Then, press Ctrl + T to adjust the size.


 TO BE CONTINUED...