Hello, Ban is Back for Group Assignment Computer Graphics 2! About Fantasy Landscape for designing a 12 Month Calender! But how to proceed? No worries!
My first Idea about the Fantasy was Purple Blueish Sky and I added some Silhouette Concept!
First, Open a NEW Workshop
Setting as A4 Landscape Size and 300 Resolution
To adding Image into the Workspace, File>Place
File >Place
Select Image that wanted to add for
Image selected
Resize image and place it in the Workspace
Resize and place
Next, Every single layer we need to Rename it so that it will make more clearly and easy for future editing (with many layers)
Rename the layer as Main Background and delete the layer of Background which is useless
To make more different from origin, FLIP the image with Image>Image Rotation>Flip Canvas Horizontal
Image>Image Rotation >Flip Canvas Horizontal
Place another Image for the Fantasy Workspace!
Place with image selected
After adding the image in the Workspace, to delete the useless frame from the image, select the Layer Mask! Whynot Eraser Tool? This is because we can reappear back the image you if you go mistake to delete.
Layer Mask is selected
Select Brush Tool to delete in Layer Mask
Brush Tool is selected
Start using the Brush Tool to delete the unwanted pixel and remain the building in Layer Mask
Delete the unwanted pixel in Layer Mask
Done with Layer Masking and rename the Layer as Building 1
Just Building is remain
Next, we gonna to do our Silhouette Building? But how? It is easy! Select Eyedropper Tool (Shortcut: i)
Eyedropper Tool
Hit the image of Main Background of the grass/forest to pick the color up with Eyedropper Tool
Hit the Image to get color code with Eyedropper Tool
Now you will get the color in Foreground Color
Color in Foreground Color
Double click the Foreground Color icon and the Color Picker Table will appear Copy the code from # which is 040404
Copy the code which selected from Eyedropper
Now, Double click the Building 1 layerand Mark the Color Overlay and change the color with paste the color code: 040404 to #
Paste the Code to #
Now, you can see the Building and the Forest/Grass are the same color, look Silhouette, right?
Same Color from Building 1 and Grass/Forest
Next, with the water/sea is applying in the image, we are going to do the reflection/Shadow of the Building on the water. Duplicate (Ctrl+J) the layer of Building 1
Duplicate the Layer of Building 1
Select Marquee Tool and right click on the imag, win Layer Building 1 copy) and select Free Transform; or you are hit Ctrl+T for Shortcut of Free Transform
Free Transform is selected
Right Click again on the image and select Flip Vertical
Flip Vertical is selected
Now, same as the step above, to get the color same as the reflection/shadow on the water, Eyedropper Tool, i is selected to pick up the color code
Pick the color
Same step, Layer Style is open with Double clicking the layer of Building 1 copy
Pasting the code in the Color Overlay in Layer Style
Now, you can see the Image is same as the theme: Silhouette! Wow!
Well Done! Don't forget to rename the Layer as Shadow Building 1
Too little of subject in the image, so I decided to add some Trees in the Workspace
Create a new Layer and renamed as Tree 1
Where to get a tree? I am try to use a brush for a Tree! I had downloaded some brushes from QBrushes andBrusheezysite. Try it Now! More than 1000 Brushes!
Loaded the Brush of tree that had just downloaded
Use it as normal Brush, hit on the screen, a tree will appear in the layer
Tree is appear with using Brush
Same, don't forget about Reflection/Shadow on the water So, step is repeated with Flip Vertical
Flip Vertical and place it on the water
Color Overlay! You get it from the Eyedropper Tool and paste the code in the Layer Style of Color Overlay
Paste the code in the Color Overlay in Layer Style
Another Layer (Tree 2) is created to create a new tree beside the Building 1
Tree 2
Reflection/Shadow again with Tree Tranform (Ctrl+T) and Flip Vertical
Place the Layer as Reflection/Shadow on the water
Before continue, Remember to rename the Shadow/Reflection on the water of the tree as Shadow Tree 1 and Shadow Tree 2!
Another image is place into the Workspace
Image is Placed
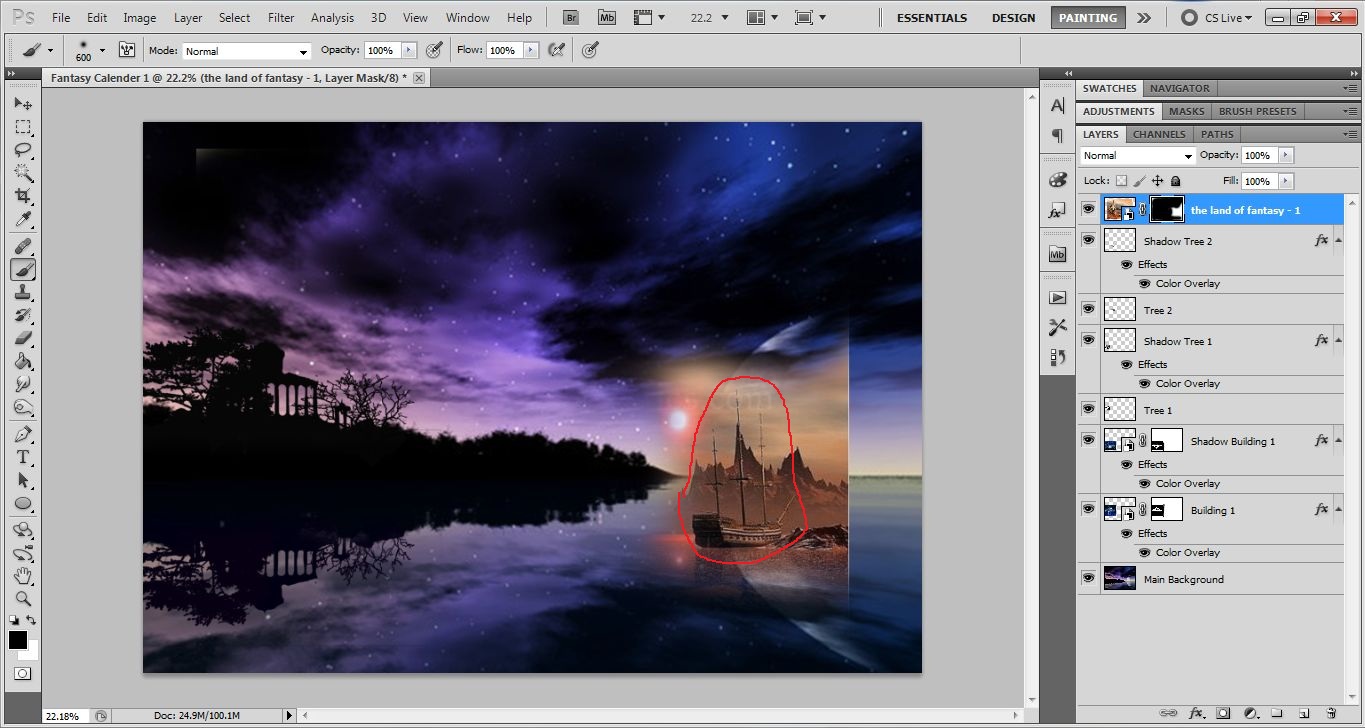
What to get? Castle? Nope, a Ship is needed! Seem we got water in the Workspace, so ship is needed! Still remember the Layer Mask? Yea, hit the Layer Mask on the Layer and using Brush Tool to delete the unwanted part!
Delete unwanted part and remain the Ship
Ship is done Masking and rename the Layer as Ship
Done Masking and Rename the Layer as Ship
Don't forget about Silhouette! Color code is got again from Eyedropper Tool and paste on the Layer Style of Color Overlay which is double clicked from the Layer of Ship
Paste the color code in the Color Overlay in layer Style of Ship Layer
Reflection/Shadow of Ship on the water, step is repeated again from Flip Vertical and pasting the color code in Color Overlay
Flip Vertical is applied again and Paste the color code in the Color Overlay in layer Style of Ship copy Layer
Another Image is placed again! But from the image, I noticed that some obstacle (Author Name) at the left bottom corner, what to do??
Obstacle
Clone Stamp Tool (Shortcut: s) is selected to clone up the obstacle
Clone Stamp Tool
Taking the source with Holding Alt and hit the image that be the source to clone Release the Alt and hit the place that needed clone!
Cloning is worked
What to select from the Image? Is a Path! Too much of water and feel blank on the part of right bottom, so I am Thinking to add some Path into Workspace!
Layer Masking again! with using Brush Tool to delete the unwanted Part!
To make it seem real and mix with the Workspace, Color Overlay is applied on the Layer of Land 1 (renamed) which is double click the layer to show the Layer Style!
Color Overlay to make to color same as the others subject
Another image is placed again. It is Castle!
Image of Castle is placed into the Workspace
Layer Mask step is repeated! Using Brush to delete the unwanted part to show to Castle only
Delete the unwanted part with using Brush Tool in Layer Mask
Silhouette effect! Make the Castle to the same color of the land! So Color Overlay is applied
Paste the code in the Color Overlay
Next, I am going to adjust the color the whole Workspace with using Hue/Saturation in the Adjustment
Select the Hue/Saturation in the Adjustment Table
Set the Blue setting as below
Setting on Blue
Set the Master setting as below
Setting on Master
So, the Image with show as below after adding the Hue/Saturation
Before
After
Next, Space Image is placed into the Workspace!
Place a Space Image
In the Layer of Space (named as Earth), select Linear Dodge (Add) in the Blending Mode of Layer
Linear dodge (Add) is selected in the Blending Mode
Although we cant see obviously the unwanted part in the layer of Earth, but we also need to Layer Masking and delete the unwanted for 100% clearly with using Brush Tool
Masking the Layer and delete the unwanted part with Brush Tool
Oh Yeah! Reflection/Shadow, don''t forget it! Duplicate the Layer and Free Transform + Flip Vertical and place it! You can change to low Opacity to show some realistic
We can see the Shadow/Reflection on the water
Next, New layer - Grass layer is created! Same, I had downloaded some Grass Brushes from QBrush
Loaded Grass Brush and select it
Apply Brush in the Layer which is on the path! Take a look for you color of Brush, make sure it is same as the path color!
Grass Brush is applied
After Grass is added, the Workspace looked like below
Workspace after Grass is added
Now, New things is added! Not image, but is Self Meteor Shower! How to do that? First, create a new Layer named Meteor Shower
New layer is created and named Meteor Shower
Select Brush Tool with soft round brush and hit on the screen
Soft round brush is applied on the screen
Select the Smudge Tool
Smudge Tool
Set the Size
Size is set
Using Smudge Tool, click and hold to pull from the point of brush
Smudge Tool help to pull the color or pixel from the point of brush
Free Transform with Ctrl+T and right click and select Distort
Tree Transform + Distort
Distort it with adjust the point
Distort
So, the Meteor Shower is showed after Distort! Next, we duplicate some of them with different size (Free Transform) to fill up the Fantasy Sky!
Some of Meteor Shower is duplicate in the Fantasy Sky
But take a look clearly, some of Meteor Shower needed to show it behind the subject!
So, we need to change the position of layer
Now, you can look it better after adjusted the position of Layer
Meteor Shower is behind the subject
Don't ever forget about the Shadow/Reflection! Duplicate + Free Transform+ Flip Vertical + Low Opacity
Now, adding some bling bling Shiny of effect on the sky! Create a New Layer which is named Shiny Star
Shiny Star as New Layer
Set the Brush Tool to the Soft round 79 pixel brush Make sure the mode is on normal, opacity on 100%, flow on 100% and airbrush off Color in White
Setting of Brush Tool
Now make a dot in the middle of the Workspace
A dot is hit on the screen
Create a new layer again named Line of Shiny Star Make a line with the Pencil Tool
Pencil Tool
Hold shift when dragging, this will make a perfectly straight line
Creating a line with pencil Tool
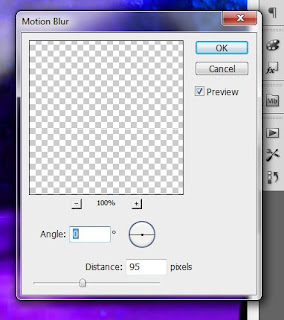
Next, Filter>Blur>Motion Blur
Filter>Blur>Motion Blur
Set 0 angle and 95 distance and hit OK
0 angle and 95 distance
Now you can see the ending of line is thinner so looked like smooth line in the screen
Smooth Line
Double Click the Layer of Line Shiny Star to show the Layer Style and select the Outer Glow
Setting of Outer Glow with White
After done with Outer Glow, move the Shiny Star and Line Shiny Star beside the Meteor Shower
Moved the position
Adding more bling bling effect, duplicate some of the layer and place it
More Bling Shiny Star is adding with duplicating the layer
So, the step are going to end Next, we going to adjust after the Shiny Star 2 of color with Brightness/Contrast in Adjustment so that is looked more Dramatic
Brightness/Contrast is selected
Setting of Brightness and Contrast
Setting of Brightness and Contrast
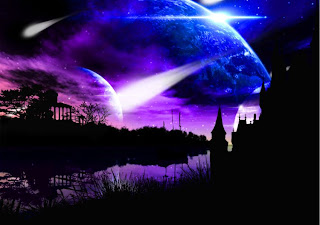
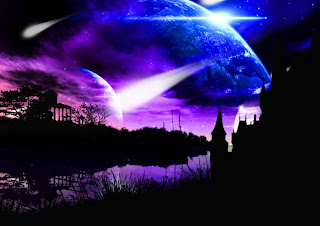
You can take a look the effects after adding the Brightness and Contrast
Before
After
Next, Color Balance for whole Image
Color balance
Adjust the Color in Setting
Setting of Color Balance
Effects take more good
Before
After
But the water is taking much color (too darken), so i use the Brush Tool to delete the effects in Layer MASK
Delete the Color Balance on water using Brush Tool in Layer Mask
Brightness/Contrast in Adjustment again for whole Workspace
Adjustment of Brightness and Contrast
After Effects added, take a look
Before
After
So, last STEP! As a calender, sure need a dare of Calender, add the date into the Workspace How to add? Please take a look: Process design the date of calender


No comments:
Post a Comment